Friday, August 28, 2020

Brake Pads Service & Replacement

Replacing rear brake pads on Mercedes Benz W203

Like everything else in life, brake pads also have a finite life span. Since I bought my Mercedes Benz  C180K, I guess it was just more than two years ago.  I've never had the need to replace its brake pads, probably because I hardly ever drove her but also that my preferred mode of transport is my BMW R1100RS motorcycle. However, since my Merc was being used by a sober drive team to  transport  Europe Assist clients, who exceeded the alcohol consumption legal limit, to their homes, I was compelled to replace its brake pads

The average distance that this team drove each night varied between 300-400 km per 8 hour shift, thrice per week.  In a matter of one month they raked up close to 5000 km.  For the 3 months they used the car prior to the announcement of Covid-19, had put 26 000 km on the odometer. In my estimation that's about the same distance I normally travel in one year. Something had to give, and it was the brake pads and my tolerance; as my Merc was returned to me with the screeching sound of metal rubbing on metal when it stopped. The Europe Assist driving gig may have seemed a good idea at the time but right there and then I decided that it wasn't. Effectively the wear and tear by far exceeds the income. 

Mercedes Benz rear Brake Pads - new and worn

Anyway, after jacking up the car and removing its wheels, I checked the front brake pads which seemed to be at half life but the rear ones were completely kaput. See pics above and below. The other side was even worse.

New brake pads inserted into brake caliper

Mercedes Benz brake pads are not expensive and replacing the rear break pads are relatively easy. It's purely a matter of knocking out the Mercedes Benz brake pad retainer pin and removing the spring clip. Then prize open the calipers and slide the new pad into place on either side of the disk and reassemble in the reverse. Fortunately, the metal to metal screech didn't damage or score the discs. It takes as little as and hour to replace the rear brake pads on both sides. 


As can be seen above, spring clip gets inserted and pin knocked back in place. But in my case, the calipers had pushed our that far that it was difficult to get it to retract. A few squirts of Brake and Parts cleaner quickly resolved the issue. 

NB! Do not spray Q20 on or into the caliper. Q20 is an oil based liquid and will soak into the ceramic material of the break pads and the brakes won't engage properly or rather wont stop the car in the distance expected. 

Saturday, June 13, 2020

Mercerdes Benz C180K Wiper Switch Problem

WIPER SWITCH PROBLEMS

In the not so distant past I took my Mercedes Benz C180K for road worthy at one of the AVTS centers but it failed horribly. Not because the car was in a poor mechanical condition  but  rather that I needed to know exactly what was wrong with it, in order to fix it to at least roadworthy standards.  So this was deliberate on my part but it cost me a good R500.00 but it was worth it. I also needed there to be a record on file that it had gone through the necessary checks. So there!

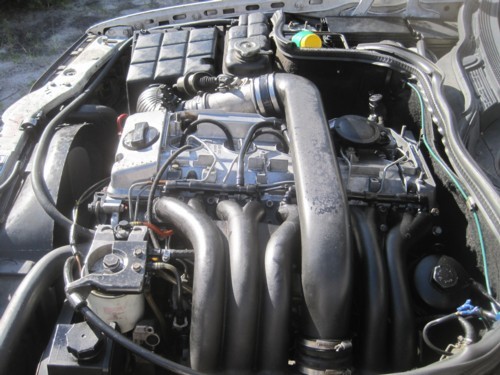
However, even though  I was able to register the Merc C180K on my name, I couldn't get its licence disk because of some issue I had with City's Motor Vehicle Registration Offices regarding the licence for a Renault Megan. I had failed to draw its licence for almost 3 years. Since, the engine had given up the ghost and I kinda abandoned it. Anyway the issue I had, involved a 12% monthly penalty fee  added to the principal amount including interest. It turned out to be a ridiculous about of money. But that's a story for another day. The image below gives you an idea of what was wrong with the Mercedes Benz C180K. A total of 13 issues that needed sorting. 


I intend to cover item 1&2  on the list and give you a rundown on its processes and procedures. As can be seen the rear wiper blade was torn which needed replacement. My personal opinion is that the examiner was being petty because the rear wiper worked and wiped away water off the rear screen just fine but had a 2cm piece at the end of the wiper blade that was delayed and dancing about. Be that as it may, it compelled me to replace it, as can be seen below.


I bought three Hella wiper blades, from their Cleantech range which are definitely not as good as the original Mercedes Benz wiper blades but a far cry cheaper. Buying cheaper certainly doesn't mean better because I ended up with a handful of plastic parts which was of no use to me. I only needed two pieces for the front wipers, as came be seen in the image below. Fitting the front wipers was a basic clip-on whereas the rear wiper needed a 10mm spanner to remove the old and replace the new.


Next on the list is the "front wiper not working". As far as I was concerned they worked on the intermittent setting,  but as far as the anal examiner was concerned, the front wiper wasn't working at all. When the push button on the indicator stalk was pressed it worked just fine for two wipes. But it also meant that it has to be pressed continually during rainy weather to keep the windscreen clear. But I'm not going to complain any further, and decided to repair the problem. To get to the indicator/wiper stalk assembly, I needed to remove the air bag, the steering wheel and the steering wheel hub. 

NB! Before even thinking of removing the air bag, it is mandatory to remove the negative battery terminal then the positive then wrap each terminal in a cloth to prevent them from accidentally making contact with the battery terminals whist you busy with the airbag. Alternatively just remove the battery. Failure to do so could cause the airbag to deploy whist removing it, and it may cause severe injury to your hands and face.


So this is what I started out with. Behind the steering wheel, there two holes with a torx screw in each. Loosening them both allows you to remove the airbag but please don't pull the airbag off, because the wires are actually fairly short and fragile. Flip the airbag over and remove all three plugs as can be seen below. The plugs have anti slip-out locks, so fist unlock them and remove the plugs carefully.


Next the steering wheel needs to be removed. It is held onto the splined steering column shaft with a single countersunk screw. To remove it you would need a hex allen socket with a power-bar. This screw will have to be re-torked on re-assembly. I don't have one so I made a mark on the steering where the power-bar touched its outer rim and re-tightened it to the same position but added a few drops of locktight liquid to the screw.


Now that the steering is ready to be pulled off the splined shaft, notice that I've made two black pen marks on the splined steering column shaft that coincides with the key slots in the steering wheel. This is to ensure that the steering wheel gets replaced in exactly the same position. Failure to do so, will cause you to end up with an offset horizontal axis.


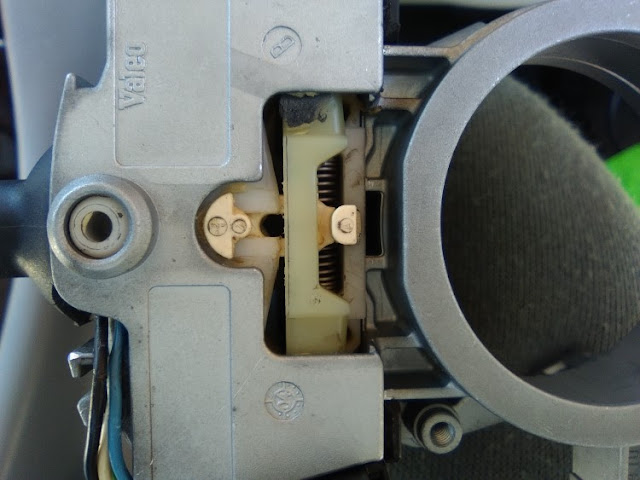
Now that the steering is out of the way, the steering wheel hub is clearly visible. The most important thing to look at in the image below is the visible torx screw head. See that it is exactly in the centre of the hole. The next image will show that I've moved the top ring of the hub ever so slightly to demonstrate that is moves even though it shouldn't be allowed to. The hub will ensure that the steering wheel returns to the correct position after going around a corner as it determines the direction of the front wheels. See the two relief diagrams on either side of the triangle. It represents the car with its four wheel, its front to at 45 degrees angle.


Notice that I've inserted my torx key into the slotted hole below. This lines up all three screws so that two pieces of tape can be pasted on the top movable part of the hub and its side. Once this is done, the three screws can be removed. Also notice the arrow head below the triangle lines up with the two  black marks on the splined shaft. 


Here all three screws are visible inside the holes. Ensure on re-assembly that they stay in this position. Refer to the images above to make sure they stay that way. After the screws are removed the hub can be lifted vertically off the shaft. The image below exposes the  wiper and the speedo-cruise mechanisms. The speedo-cruise mechanism isn't held down by screws and also just lifts out. be careful not to loose the two plastic slides that sits directly above both the wiper and speedo-cruise stalks.  


Now that the speed-cruise unit is removed, the screw on the right side on the opposite side from where the stalk protrudes. As can be seen below, the torx key is pushed through a hole in the plastic housing from the bottom, to undo the clamp screw. And the next image shows the screw almost totally removed. Thereafter the entire unit along with its plastic housing can be lifted off the steering column shaft.


This is what all the fuss was about, getting to the wiper switch. The image below shows the underside of the housing and the three visible screws than needs to be removed to get the switch mechanism out of the housing. 


The image below is the reason why everything had to be taken apart. So you can either replace or repair the Mercedes Benz combination indicator light wiper switches assembly assembly which costs well over R3500.00. The only problem is that the blue wire broke off. In fact the blue wiper wire  was cut by the sharp edge of the black wiper stalk at the point where the wires go into it. I believe this is a fairly common problem and that Mercedes Benz has somewhat modified the wiper stalk in later models to prevent the blue wire from being cut. 


As can be seen, I just didn't solder the broken wire back together again. I extended it with a 2cm length of wire to prevent it from pulling light. By so doing provided some play in the blue wire for movement.


The switch assembly fully assembled, ready to go back into its housing.


What you may notice on the above pic is that a filed away a piece of the wiper stalk exactly where the four wire enter into into it. The sharp edge of the black wiper stalk is what cut the blue wire in the first place.


Make sure the cream slide which moves to two different position when the indicator stalk is move up or down.  Failure to see that it moves correctly when the wiper stalk is move may need you to disassemble and redo it.


Assembly is the reverse of disassembly. It's a good idea to take photographs of every step just in case you forget the assembly process then you can at least revert to those pics.


Once everything is back together, the wiper turn switch at the end of the wiper stalk should work seamlessly. Do not reconnect the battery to test its functionality mid-job. Fully assembly before the battery is reconnected. It would prevent the airbag from popping, or leave you with a dash board airbag lite that won't go off.


Sunday, November 18, 2018

Mercedes Benz problems

Mercedes Benz C250D

My experimentation on my Mercedes Benz C250D started after I was totally and utterly disappointed by the lack of commitment and utter incompetence displayed by a "diesel mechanic" who came highly recommended by my brother of all people. When I initially bought the C250D she started with difficulty, besides the  injectors were a bit noisy. This wasn't too huge of a problem, because once she started, she would continue to start and drive perfectly normal throughout the day. However, if left overnight, air would somehow seep into the fuel line and the struggle to get the engine started resumed the following morning.  To alleviate this problem, I went and bought a can of "Spanjaard Quick Start" spray for diesel engines; in order to get the engine started for the "first start of the day"... everyday!   It's what I needed to do and was willing to do, to overcome her "morning sickness".


Spanjaards Quich Start Spray

 My dad had a fleet of BMC diesel trucks for several years, so my elder brother who subsequently qualified as a diesel mechanic and I were assignment with the responsibility of fleet maintenance.  As such, I was exposed to truck and car engines and general mechanical repairs for several years, in fact throughout my high school career. During this time I learnt much about the internal combustion petrol engine, indirect injection diesel engines, injector pumps, injectors, spill timing, glow plugs and working of the Otto engine and so much more. 


 However, even though I understood mechanicals fairly well and was pretty much able to do all my own repairs; I disliked always smelling like oil or fuel and detested that my hands and nails always looked dirty, even after I had cleaned them thoroughly. I therefore preferred outsourcing my mechanical work to a qualified mechanic or two. Always thinking that they could or rather would do a better job than me. But boy, was I wrong!

The replacement set of injectors with complete threads

One day, whilst driving  my Mercedes Benz C250D I got the very distinct smell of diesel inside the car —which definitely wasn't normal. So I popped the bonnet; and on further investigation found a pool of diesel inside each of the "Injector wells". The  "Injector well", closest to the firewall was almost completely full whereas the amount of diesel in each of the other four, varied towards a lesser amount. I suspected the leak-off pipes had become brittle or had reached their end of life hence not seating properly. Ostensibly the cause of the air leak that prevented the engine from starting in the morning. 


The injectors that were in the engine. Look at the rightmost injector
- the treads are all damaged with only 4 left as opposed to 7
I really didn't fancy doing the the job myself,  so I consulted by brother  who suggested I should take my Mercedes Benz C250D to this "highly recommended diesel mechanic"  mentioned above. My elder brother was my first choice to do the repair and he could quite easily have repaired it for me. However he had fallen from a scaffold onto protruding bolts whilst working on a ship and permanently injured his spine. He therefore couldn't do any physical work in a bent over position.  For the sake of brevity, I'll call the mechanic Joe.

My initial contact with Joe was somewhat moronic. After I explained about the "morning sickness" and the diesel in the injector wells and the noisy injectors, he gave me a song and dance about having to remove the injectors. Adding that they would have to be serviced, and that they needed to be pressure tested, blah blah blah and the repair cost would be R5500.00. Ending off  that it would take four days. I felt he was a a bit expensive but since Joe didn't know that I knew exactly what needed to be done, I gave him the benefit of the doubt and the go-ahead. Especially considering that he was one of my brother's fellow diesel mechanics. 


Engine with replaced Injectors

I later came to realize, it was the mistake of my mistakes. I might as well have distributed my cash among the street beggars because I would at least have felt that I had gotten more bang for my buck than the flack I received in return from Joe. Four days later, I went to fetch my car and it wasn't ready. His excuse was that Mercedes Benz agents only had 3 copper Injector Heat Shield Washers in stock and that he needed 5, promising that I could get my car back in within a week. I eventually got the car back; and the very next morning the C250D wouldn't start and in the process I drained the battery. Some  "Spanjaard Quick Start" spray later and a jump start got  the C250D going once again.

Slightly pissed, I took the car back to Joe. Enroute I smelled diesel as before and stopped along the road, only to see that my black plastic rocket/cylinder head cover wasn't replaced and that each of the wells were partially filled with  diesel. I was furious, because in exchange for my payment, at the very least I expected Joe to fix this problem, as well as the no cold starting problem and he did neither. Joe wasn't in that day, so I dealt with his son Abe. He asked me to leave the car with him and that he would relay my complaint to Joe. Three days later I phoned Joe to get a progress report. I was told to collect my car the following day. 

On my arrival and in Joe's absence, Abe told me that the C250D wasn't done because the local Mercedes Agents didn't have the required thickness leak-off pipe in stock and that they needed to fetch the correct thickness from the Mercedes Benz Agency in Somerset West. Three days later I got the car back and it appeared that the leak-off pipes problem was fixed. However the no cold starting problem persisted which I only came to discover the following morning. Once again, I took my back and when I arrived that Joe's workshop they were in the process of moving to a alternative premises. Joe then asked me to give him a few days to settle in and bring my car to the new business premises. 

Two weeks later I took the C250D back and told Joe about the original no cold starting problem which he then said he would fix. Following day I got a call from Joe, saying that he checked every connection and that would have to replace all the transparent pipes at a cost of R1500.00. He assured  me it would solve the problem, so once again I gave him the go ahead. Three days later I got the car back. I then checked on the repairs that were effected, only to discover that the transparent diesel pipes looked like they weren't replaced. So I called Joe to inquire why he had charged me R1500 and didn't replace them. He replied that the transparent pipes were replaced, but with a "good second hand" set. 

I wasn't really unhappy because I was under the impression that I was paying for a new set of pipes. The following morning, the no cold starting problem was back. In fact it was never fixed, so once again I relied on the quick start spray  to get the engine going so that I could take it back to Joe. After haggling over the age of the car and the unknown pressure of the injector pump, Joe suggested that he fit an in-line electrical fuel pump to siphon the diesel from the tank, making it easy for the injector pump to get to the required pressure. All I can say is that I paid another R750.00 for the in-line electrical diesel pump and labour and it didn't solve the problem.


Electric fuel pump that wasn't needed in the first place

Whilst driving the car, I could hear a very high pitch whistle emitting from the engine but couldn't initially identify it, but after seeing the top of the engine was wet with diesel 
on switch off, I knew it had to come from some where. I then dried the top of the engine, covered it with brown paper, started it  and monitored it.  After a few minutes, I saw the oily marks of the diesel appear through the brown paper above the injector closest to the firewall.  I found that there was a very aerosol-like fine spray squirting from the injector well. On closer inspection, I heard that the high pitch whistle was coming from the injector and realized it was caused by the spray escaping from the cylinder. So looking down the well, I saw the bottom of the injector well covered with a wet black coal-like crusty substance, and knew I had it had a case of "black death".  

This problem commonly occurs with  Mercedes diesel engines when one or more of its injector seals leak. This "black death"  problem can arise when an already used heat shield washer is fitted or inserted upside down (wrong way round) or the injector isn't sufficiently torqued or the injector seat is damaged. As a result, uncombusted diesel and exhaust gases escape past the injector seal, or rather forced out of the cylinder by exhaust compression. This forms a black coal-like hard to remove crust in the injector wells , which will only get worse if not remedied. Installing heat shield washers upside down can damage the injector seat causing it to leak. The only way to correct this problem is to ream out the injector port with an injector seat cutter, insert a new heat shied washer the correct way and torque it to recommended tension.


The 5 heat shields and their used counterparts- correct way up

The 5 heat shields and their used counterparts- wrong way up.
This revelation required me to take the car back to Joe because they had removed the injectors and refitted them. By implication, this was plain bad workmanship. A week later I got my Mercedes Benz C250D back. There was no evidence of "black death" but  two weeks later it returned. By that time I just had enough of Joe because he had my car for a total of 84 days and my C250D was now in a worse condition than when I initially took it to him. I then decided to take my  car to another mechanic who was willing and eager to fix the problem but when I related my woes and told him about my misfortune with Joe, he was hesitant. Apparently he knew Joe fairly well and said they often loan one another's specialized tools, then added he doesn't have the specific spanner for my injector and therefore cannot do the job.

I always knew that if you want something done properly then it best to do it yourself. So that's exactly what I decided to do. I went online, found the requisite injector spanner and ordered it on e-bay, and it was delivered within 40 days. It is described as  1/2" drive, 22mm Diesel Injector Socket Tool For Mercedes Benz OM604 OM605 OM606 ... 1993–1995 W202 C 250 D. 


Assembled engine with replacement injectors.
Within two days, I had the injectors out and replaced them with another set, taken from a complete C250D engine I subsequently bought. It didn't take me long to identify the air-leak that initially caused the morning sickness. I turned out to be a hairline crack in the diesel pre-heater so  swoped it with the pre-heater from the other engine. Now that the fault that plagued me all the time was fixed, I discovered Joe and Abe left me with a new one. They had stripped the tread of the injector closes to the firewall because after I replaced the injectors the high pitch whistle was back. 


Saturday, October 27, 2018

Mercedes Benz W203 starter problem

Mercedes Benz W203 starter problem

About 2 months ago, my Mercedes Benz W203 C180K Kompressor's starter motor started slipping when attempting to turn-over  the engine. On average the bendix drive slipped twice for every three tries. Then it progressively got worst, requiring several more attempts before it would finally engage.  My wife was at her tethered end and refused to drive the car unless I fix it. So I planed to do so the upcoming weekend, encouraging her to use the car until then.  

However, as fate would have it, I was forced to fix it much sooner than I anticipated. My wife drove into a Fish Hoek garage for fuel and when the attendant was done, she started the car but nothing happened, the starter didn't turn over, it was silent,  not even a click. After a few more attempts she gave up and phoned me to relate the above mentioned problem, so I grabbed some tools and jetted to her rescue. 

On arrival, I checked that the starter fuse was OK and  I knocked the starter relay with a screwdriver handle a few times, but without success. Then I asked her to turn the key, while I knocked the starter with a ball pane hammer a few times, but to no avail. It started to get dark so I phoned for a roll-back and had to car taken home. The following morning I started my diagnoses. 
Mercedes Benz W203 C180k SAM with its
water proof cover removed.
I suspected that the starter was faulty but wasn't willing to remove it, not until I made sure it wasn't anything else that caused the same symptoms.  So I removed the SAM cover and once again systematically checked all the fuses with a multi-meter. I even switched on the ignition and checked for voltage on either side of every fuse just to make certain I didn't get an ohms reading through some other circuit previously. It all seemed fine, all the fuses were OK. 

Next I pulled out relay the S - starter relay, removed its cover to inspect its contact to see if it wasn't burnt and checked its solenoid for continuity. It seemed fine, but I wasn't convinced that the relay per se was OK. Now since a relay is a electro-mechanical active device I needed to test it, to see if it performs as it should. A relay is just a remote switch, implying in order for it to switch, it must be remotely controlled by a voltage originating from another switch contact. In our case, when the ignition switch is turned on, it sends power to the the relay solenoid which then activates the relay.

Mercedes Benz W203 C180k Starter Relay with the
 diagram clearly visible on its cover
The diagram on the relay cover, shows where each of the terminals  connects to, but it doesn't follow international relay convention. On the diagram, the terminals are marked as 1 and 2, 3 and 5, with 3 and 5 being the physical switch, 1 and 2 being the solenoid winding. In the above image,  the pin marked 3 would normally be marked as 87 and the pin marked 5 would normally be marked as 30. Have a look at this relay. 

These pins carry the load which is normally Open-Circuit and only closes when its solenoid winding is energized.  The pin marked as 1 would normally be marked 85 and pin marked 2 would be normally marked as 86. Be that as it may, this relay was probably an after market component, even though it sports the Mercedes Benz emblem on the other side. It worked fine even though it was a fake Mercedes Benz relay.
Mercedes Benz W203 C180k starter solenoid continuity test
With my multi-meter switched to ohms, I checked the solenoid winding and as you can see, it measures .3 of an ohm. The solenoid winding is connected to the multi-meter with 2 dog clips that is connected to the multi-meter's leads. In the image below, I'm applying 12 volts to the relay solenoid with the dog clips connected to the switch and the relay activated as it should. 
Mercedes Benz W203 C180k starter relay solenoid switching test

Mercedes Benz W203 C180k SAM with the Starter relay 
and fuse in the top left hand corner
Satisfied that the fuse is OK and that the relay was working as it should, I needed to bypass the relay, thinking that the Ignition switch may not be sending the required voltage. So looking at the image below, the relay in the far left corner, sitting behind the red fuse is the starter relay, which I reinserted. Mercedes Benz agents are fully aware of the starting problems Mercedes Benz owners are experiencing with the cars. 

So they've even published a bulletin, recommending that when their techs receive a job card with Engine Not Starting / Starter Fuse Malfunctioning, that the 15A fuse F52 which may be blown on the Signal Acquisition and Actuation Module (SAM) should be ungraded to a 20A. 

This issue affects the following sub-types of the Mercedes Benz W203 chassis:- 203.040 / 203.052 / 203.054 / 203.056 / 203.061 / 203.064 / 203.065 / 203.076 / 203.081 / 203.084 / 203.087 / 203.092 / 203.261 / 203.264 / 203.281 / 203.284 / 203.740 / 203.747 / 203.764. Essentially Mercedes Benz W203 C-Class C180, C200, C230, C240, C280 and C320 year models ranging between 2000- 2008. 

Mercedes Benz W203 C180k starter relay removed
and replaced by a link between its load contacts
As can be seen in the above , I subsequently replaced the starter relay with a thick black jumper lead, now occupying the place of the stater relay connected to pins 3 and 5 of the removed relay. With this thick black jumper in place, the starter should turn if its not faulty when I turn the ignition key. Unfortunately nothing happened, though proving decisively that the starter was indeed faulty. 

So I got out the tools and removed the starter after I had checked that the started solenoid voltage was present when the ignition was turned. Due of limited space between the bell housing and the car body, I needed to joint 2 long extensions together with a swivel adapter in between for flexibility. Then added a second swivel adapter between the extension and the 15mm spline socket, all attached to a power bar to remove the two long starter bolts.
Faulty Mercedes Benz W203 C180k starter with solenoid screws undone
After removing the starter, and cleaning the grime from it, I struggled to undo the starter solenoid screws and ended up damaging the screw heads. I then resorted to an impact-driver but to no avail because the screw heads were just too damaged. I  painstakingly hammered each screw with a cold chisel and  eventually I got them loose. Luckily I had another starter from which I could salvage three screws that were in perfect nick.

Mercedes Benz W203 C180k starter completely dismantled.
Opening up the starter was quick and easy, only to reveal that two of the four brushes were completely worn down to its very last, and two dangling copper wire braids that were attached to brush graphite at some time in the not so distant past. The brush module was clogged with grime and to make any sense of what I was dealing with, I had to clean it up.  
The faulty Mercedes Benz W203 C180k brush panel fouled with grime
So out of curiosity, I cleaned up the debris to reveal the following. One of the springs were broken and slightly worn away. A small piece of one  of the brushes survived along with the brush holders, non of which were usable because the new brush panel comes as a complete unit. The fact that the brushes didn't make contact with the armature any longer was the real reason why the starter wouldn't turn-over. Besides, it very miraculously and very surprisingly continued working until its brushes were beyond end of life. Lucky me...
Disposable parts of brush panel

Brush panel backing plate with braid wires still attached
As can be seen in the image above, the brush panel still has two bits of braided wire that was once attached to brushes. Using a stick I further removed the rest of the grime out of the field coils and wiped it down with a solvent in order to restore it to its former glory. 
The Mercedes Benz W203 C180k field coils in the process of being cleaned.
Prior to this starter problem. I had the Oil Cooler replaced which you can read about in the previous blog page. I suspected that oil had dripped down onto the starter, seeped inside and mixed with the worn-off brush particles to form a sludge. Considering that the Oil cooler sits directly above the starter, there was no other reason for the thick oil-like substance that's visible on the stick above, to be inside the starter. 
The Mercedes Benz W203 C180k field coils after its been cleaned.
With the field coils all cleaned and shiny. I started the repair process by buying a new bendix and a new brush panel kit. The part numbers are as follows: Bosch part number 1006 209 801 and Bosch part number 1004 336 526 respectively. It is also clearly visible on the respective packaging.

The new Mercedes Benz C Class W203 bendix
The new Mercedes Benz W203 brush panel 
with the brushes side up.
The back side of the new 
Mercedes Benz W203 brush panel
The old bendix drive had virtually no friction or rather resistance on rotation, so comparatively it was easy to determine that it was definitely faulty. Besides it is the only item inside the starter motor that can produce the slipping sound. Surprisingly, as can be seen in the pic below, the teeth of the bendix  where it meshes with the teeth of the flywheel weren't worn off at all. 
The new Mercedes Benz W203 bendix on the shaft and the old and worn 
Mercedes Benz W203 bendix below.
Fortunately the armature wasn't damaged in the process, and a few light strokes with a piece of  emery cloth rendered the brush contacts shiny and smooth. There was no visible wear on the armature shaft either, because the bronze bushes were impregnated with oil which dripped into the starter. 
The Mercedes Benz W203 armature before cleaning 
and the solenoid after testing it for continuity.
Reassembling the starter was quick and easy because everything just slipped together. The bendix slid onto the shaft and the fulcrum slid into its guide, all of which slid into the field coils without any fuss or bother. 
The Mercedes Benz W203 bendix assembly with the fulcrum 
balancing on top of it.
Getting the new brush panel onto the armature was simple because of the disposable plastic  guide that keeps the brushes the exact distance from the armature contacts to just slip it into place, as can be seen below.
The new Mercedes Benz W203 brush panel seated onto the armature.
The disposable plastic guide just about to pop out of place

With the rear cover in place, it was time to fit the grease cover.

Mercedes Benz W203 Bendix drive assembly ready for assembly

Mercedes Benz W203 Bendix drive inserted into casing and ready for assembly

Mercedes Benz W203 starter assembled 
but in the process I chipped a piece off the casing.

Assembly complete with screws torque to correct tension

Starter fully assembled ready for testing

Starter fully assembled Mercedes Benz W203 starter ready for testing.
Earth jumper cable connected on the body of the Mercedes Benz W203 
starter  and 12V connected on the solenoid supply side.
As can be seen the battery voltage sits at 12.27 Volts prior to testing
Multi-meter connected to battery supply shows that the voltage dipped
just under  11 volts when cranked.  As can be seen the green dog clip is
 connected to the solenoid and I'm touching the other end to the  the 12V supply,
Mercedes Benz W203 starter was fitted and car started first time
_________________________________________________________________________

W203 doesn't start, does not crank. / Mercedes won't start. / Merc W203 starting Problem. / How to remove starter motor of c180 kompressor W203./ Mercedes benz starter motor problems. / Fixing A Mercedes-Benz That Won't Start./ Engine won't crank over with the starter. / Why is My Mercedes having a starting problem? / Mercedes Benz starter motor problems. / Mercedes Benz starter problems. / W203 mercedes benz won't start. / Mercedes Benz W203